Tagging
Tagging writes tags (and a natural-language description) for every image in a dataset, saved as a .txt with the same name as the image. The quality of the tags directly affects the training result.
Models
Section titled “Models”| Purpose | Model | Where to set it |
|---|---|---|
| Tags | WD14 | Can be downloaded on the tagging page the first time. If you already have it, choose its folder in ⚙ Settings → Resource folders → WD14 model for tagging (it needs model.onnx or model.safetensors, plus selected_tags.csv) |
| Descriptions | JoyCaption (GGUF) | Choose its folder in ⚙ Settings → Resource folders → JoyCaption for descriptions; it needs the main file (for example Q8_0) and the vision part whose name contains mmproj. You can also put them in joycaption in CoCo’s model folder |
Tagging images
Section titled “Tagging images”- Click a card in the dataset list to open “Tagging”.
- Set the trigger word, thresholds and cleanup rules in the left panel.
- Press “Tag”.
| Item | Description |
|---|---|
| Trigger word | Added to the front of every image’s tags; remembered per dataset |
| Thresholds | How confident the model must be before writing a tag. Lower writes more uncertain tags; higher keeps only confident ones |
| Cleanup rules | Keeping character-name tags, prefixes to drop, underscores to spaces, escaping parentheses, removing duplicate tags and so on |
| Overwrite existing tags or descriptions | Images that already have tags are skipped by default; check this to write them again |
Writing descriptions
Section titled “Writing descriptions”The “Description” section of the left panel uses JoyCaption to write a natural-language description of each image, added after the tags:
| Item | Description |
|---|---|
| Length | Short, Medium, Long |
| Use existing tags as reference | The existing tags are used as a reference |
| Prompt | Tells the model how to write the description; {length} is replaced by the chosen length |
Press “Write descriptions” to start; select some images and press “Rewrite descriptions” to redo only those. Images that already have a description are skipped by default. The generation model is unloaded before writing descriptions and reloaded automatically the next time you generate.
Measured on an RTX 5080, 18 images take about 25 seconds (including about 6 seconds of first-time loading).
Reviewing
Section titled “Reviewing”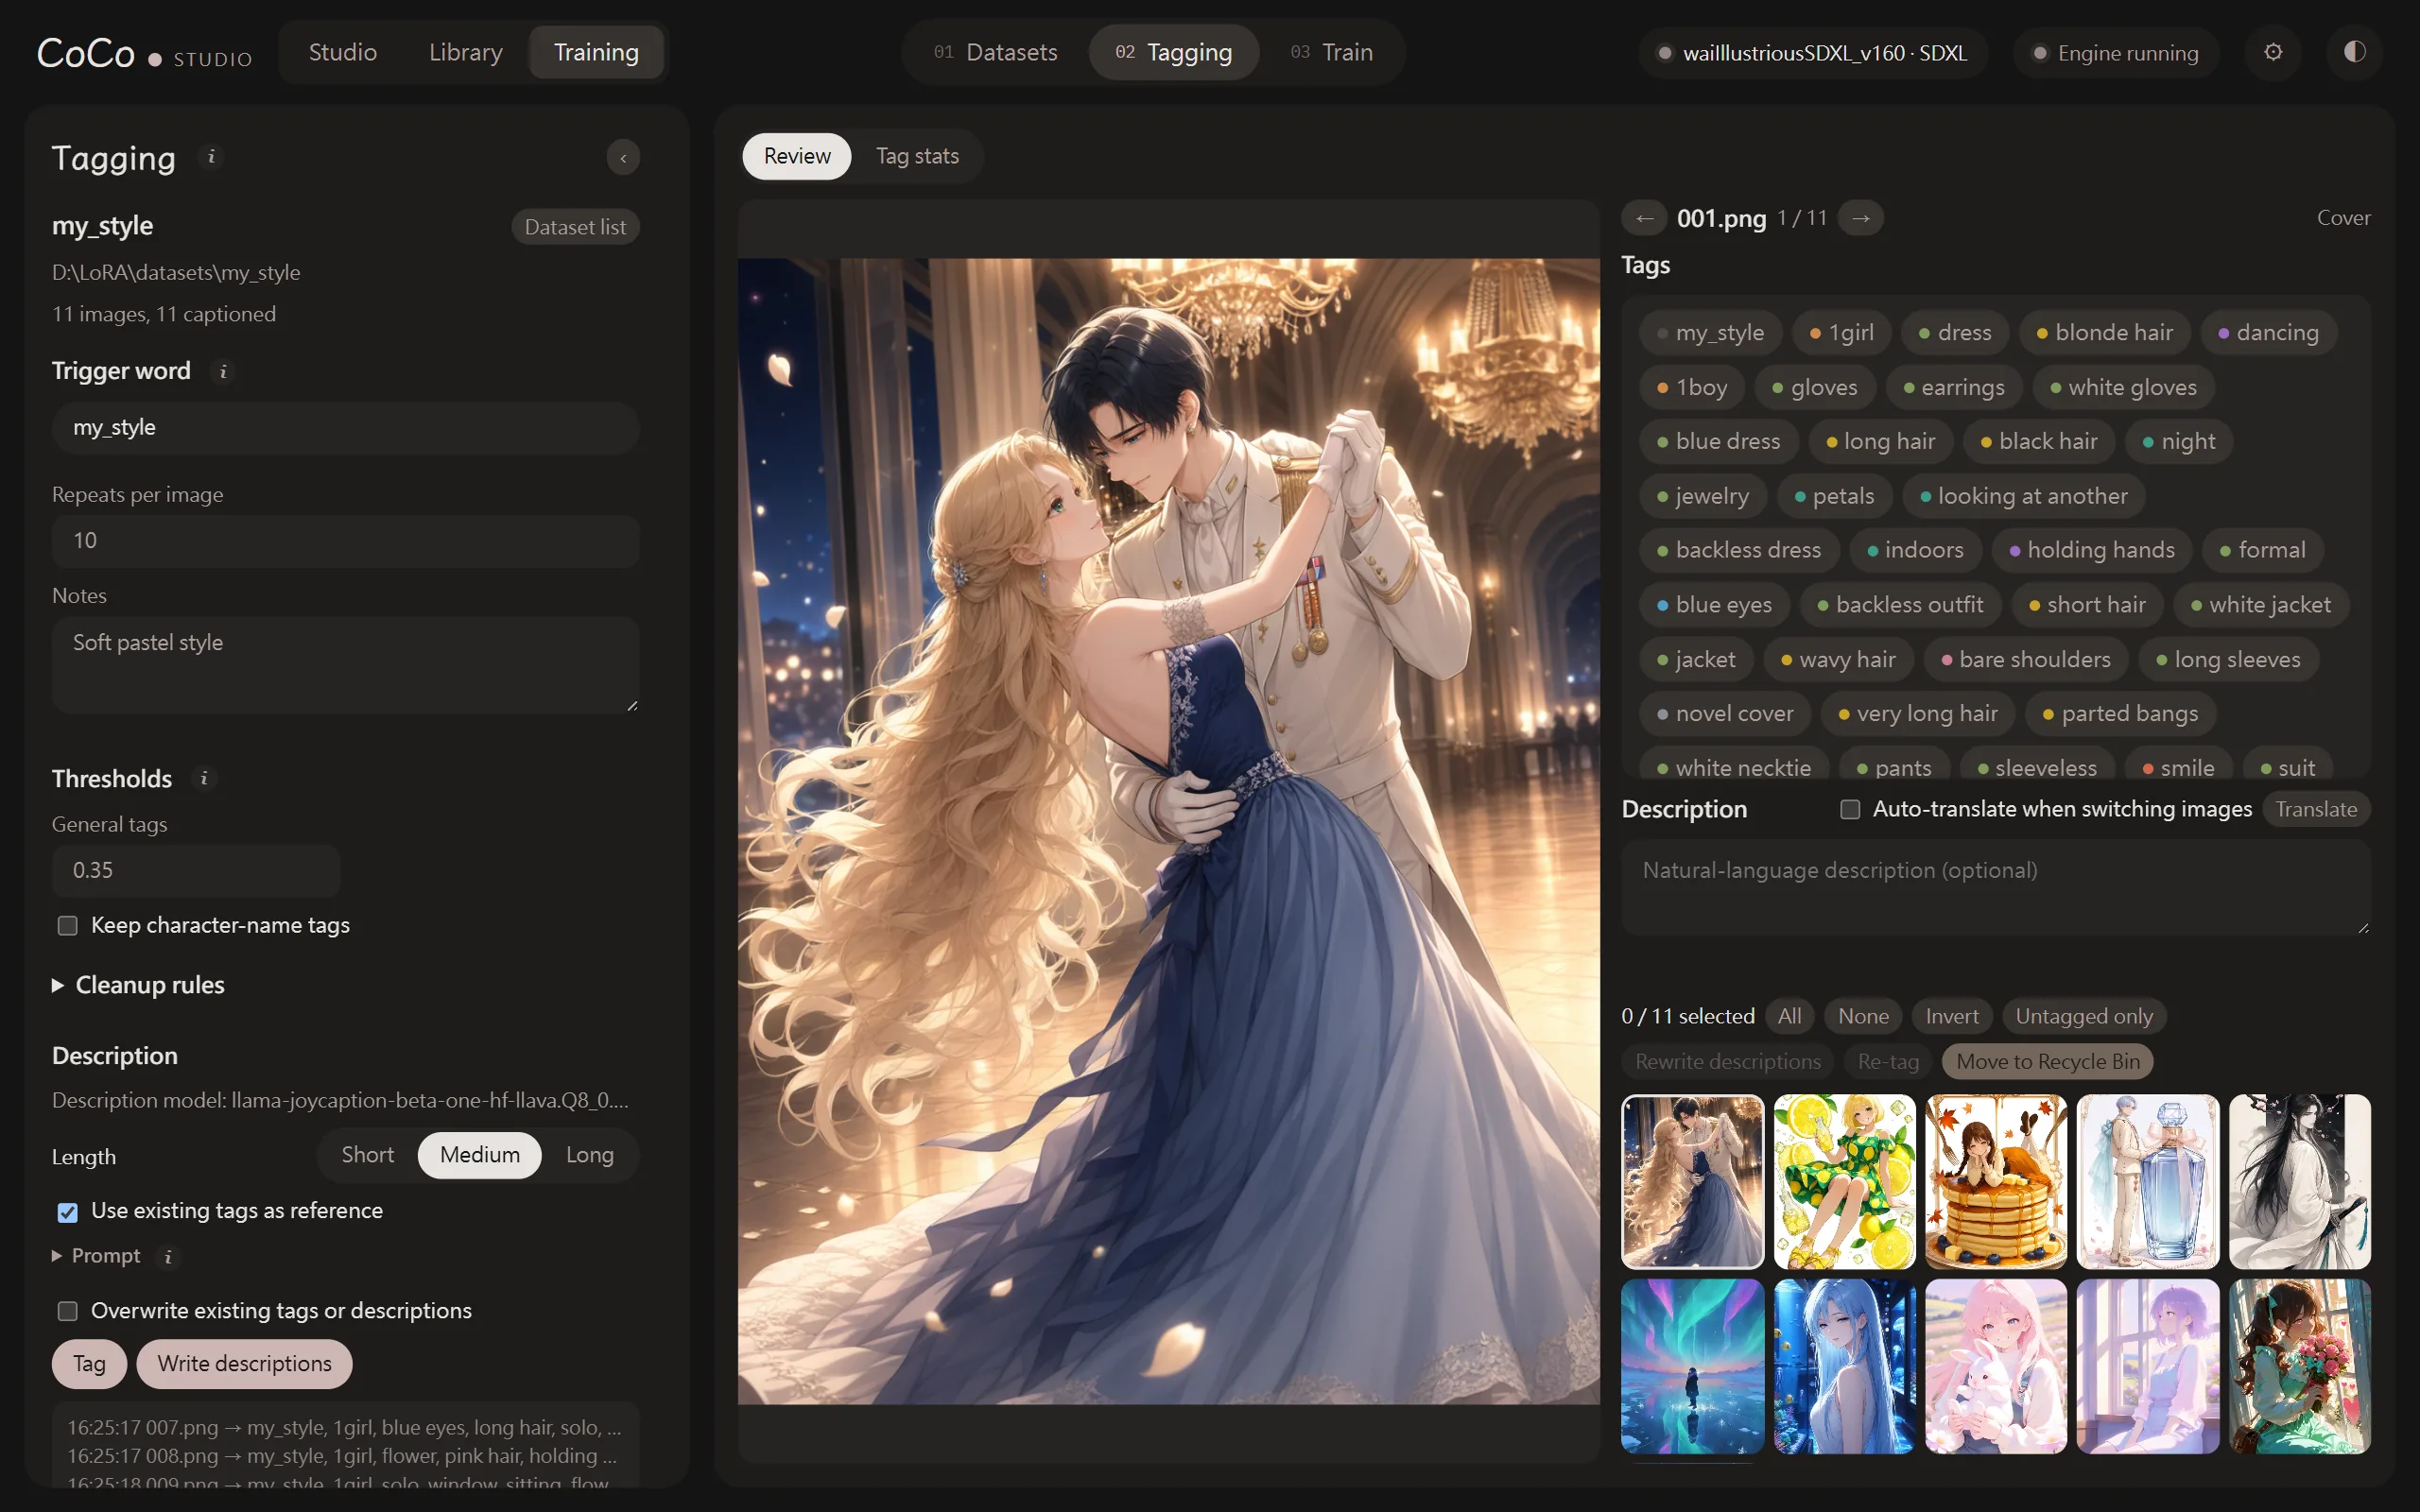
“Review” on the right lets you check and edit each image:
- The current image fills the middle column; click it to toggle actual size.
- Tags are edited in the same tag mode as the generate panel (with category colours and translations), and the description has its own box. Changes save automatically.
- ← → switch images; Ctrl+Enter saves and moves to the next.
- “Translate” translates the description for reference; with “Auto-translate when switching images” on, it translates whenever you switch images.
- “‹” at the top right of the left panel collapses it to make the image larger.
The thumbnails below can be multi-selected (All, None, Invert, Untagged only), then “Re-tag” or “Move to Recycle Bin” (caption files go too).
Tag stats
Section titled “Tag stats”“Tag stats” lists how many images each tag appears in, for bulk edits:
| Action | Description |
|---|---|
| Replace | Replaces one tag with another |
| Remove | Removes a tag from every image |
| Add to all | Adds a tag to every image (the trigger word goes first) |
These actions change tags only; descriptions are untouched.